How to create a data room on Papermark?
A data room is a secure space where you can share multiple documents with stakeholders. Papermark takes this concept further by allowing you to add your own branding, creating a professional and cohesive sharing experience. Here's how you can set up your own branded data room in Papermark.
Full list of Papermark Data Room features
Step 1: Create a data room trial in onboarding

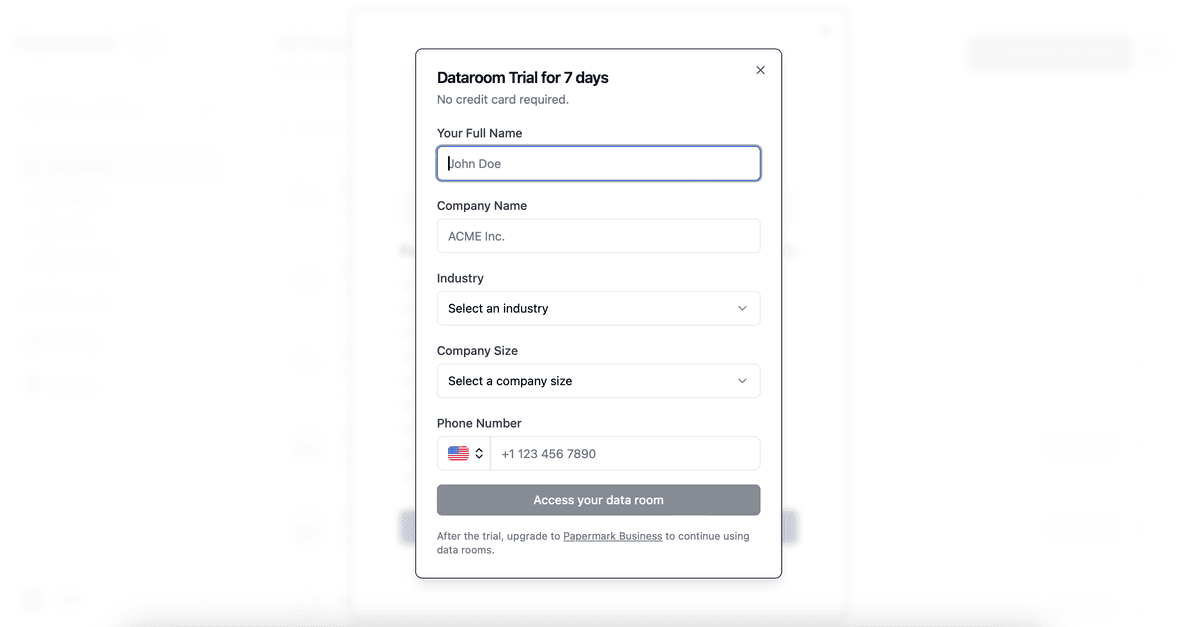
You can set a free 7 day trial for data room during onboarding
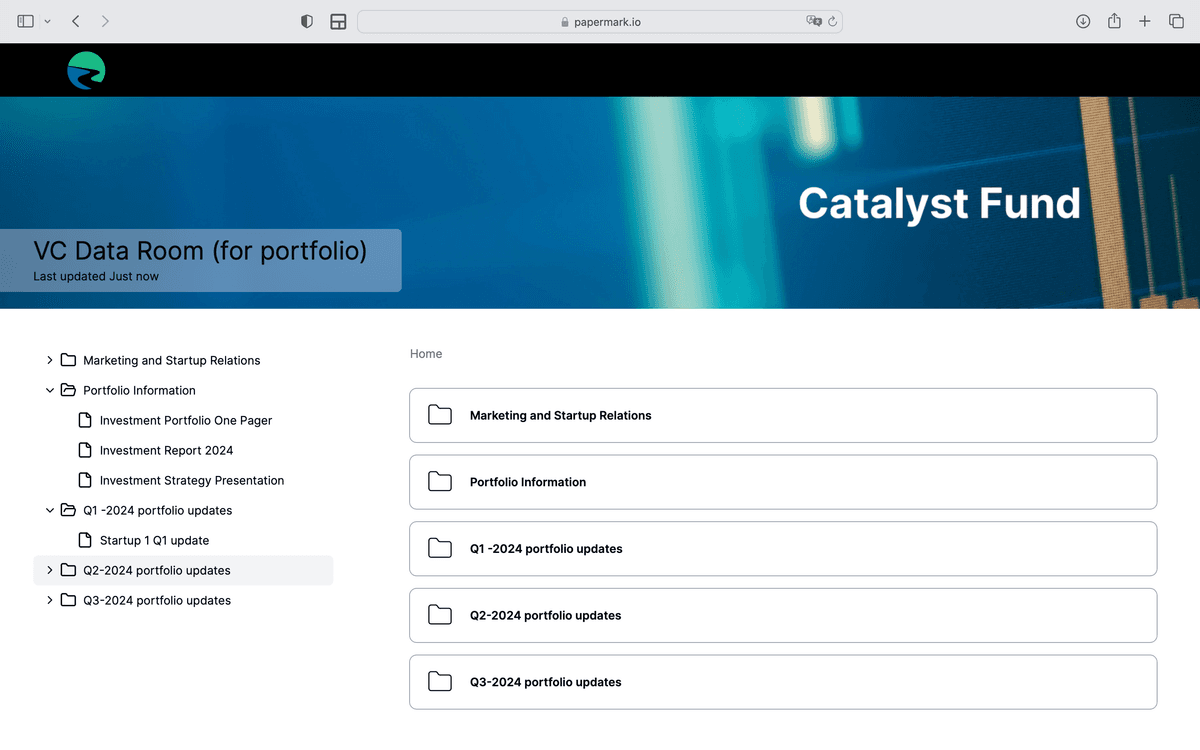
Step 2: Upload and organize documents in folders

Upload the documents you want to include in your data room. You can also organize existing documents into this folder.
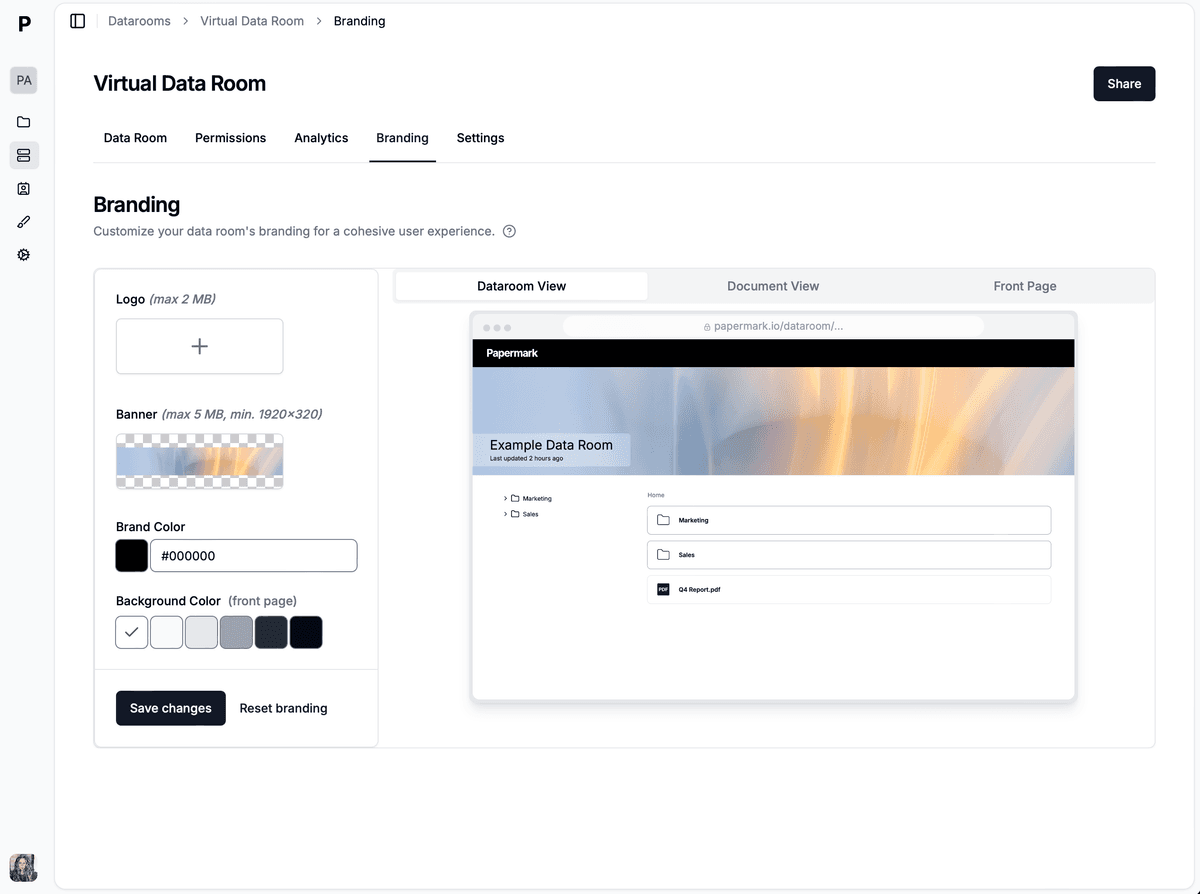
Step 3: Customize your data room branding
- Logo
- Banner
- Brand Color
- Custom socila media cards
- Custom domain
- Favicon
- Meta tags
Learn more about Data Room branding
Step 4: Secure your data room
Protecting sensitive documents is crucial when sharing business information. Papermark offers robust security features to ensure your data room remains accessible only to intended viewers.
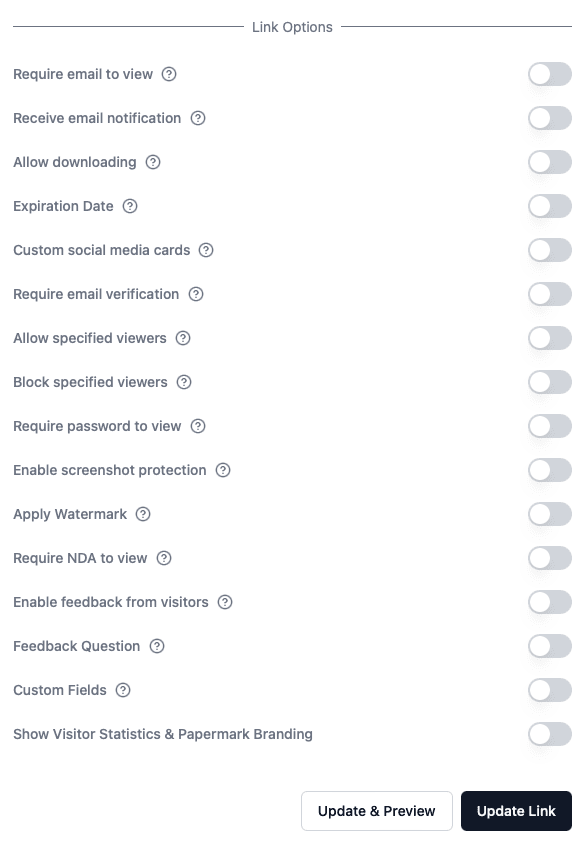
Core security settings:
- Require email to view: Force viewers to provide their email before accessing your data room
- Email verification: Add an extra layer of security by requiring email verification
- Password protection: Set a password that must be entered before viewing documents
- Expiration date: Set an automatic expiration date for your data room link
- Allow/block lists: Specify exactly who can and cannot access your documents
- NDA requirements: Require viewers to sign a non-disclosure agreement before access
- Watermarking: Apply custom watermarks to protect your documents from unauthorized sharing
- Screenshot protection: Prevent viewers from taking screenshots of sensitive information
Learn more about link security settings
Granular permissions for advanced security
For enterprise-level security, Papermark offers granular permissions that let you control exactly what each user or group can access within your data room.

With granular permissions, you can:
- Create user groups with specific access rights
- Control view and download permissions at folder and file levels
- Share specific group links with tailored permissions
- Override folder-level permissions for individual files
Learn more about granular permissions
Step 5: Share access to your data room
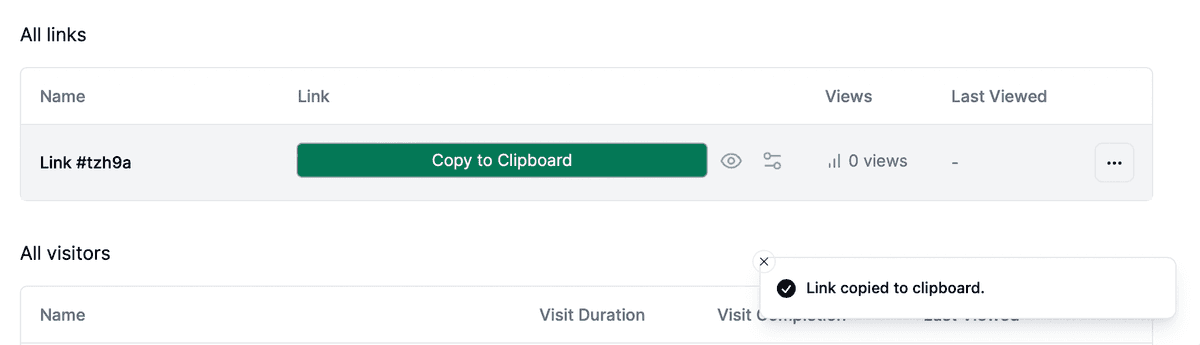
Once your data room is set up and branded, you're ready to share it. Generate a shareable link and distribute it to your intended audience.
- Share with group of people, using group link and granular permissions
- Share with collaborators to upload documents
- Share with individual viewers
Step 6: Track activity in your Data Room
With your data room live, you can track how users interact with the documents. Papermark's analytics will show you who's accessing the data room and which documents are getting the most attention.

Track comprehensive analytics including:
- Number of visits to your data room
- Total time spent by each viewer
- Per user analytics to see individual engagement
- Per document analytics to understand which files are most important
- Page-by-page insights for detailed document engagement
- Geographic data to see where your viewers are located
- Session data including download activity and device information
Learn more about document analytics
Self-hosted Data Room
If you are looking to self host your data room to make it more secure.
Advantages of Using a Data Room in Papermark
- Sharing with one link: Instead of sharing individual documents, share a single link to the data room containing all relevant materials.
- Enhanced Security: Keep sensitive information secure with controlled access, ensuring only the right eyes see your documents.
- Professional Presentation: A branded data room makes a strong impression on stakeholders, showcasing your professionalism.
Conclusion
With Papermark you can create a data room and share documents securely via custom link.